Audio enhancement perma-grin style
Results 1 to 10 of 153

Thread: Audio enhancement perma-grin style

Hybrid View

Previous Post Previous Post   Next Post Next Post
  1. #1
    Senior Member F6Pilot's Avatar
    Join Date
    May 2014
    Location
    Chattanooga, TN
    Posts
    418
    Here is my start on the wiring. I will readily admit to being a novice, tilting more to the mechanical side than the electrical. You know, if you cant fix it with a bigger hammer...you've got an electrical problem.

    I have posilocks on the way to help with the interconnects, but will really need some help understanding the "from" stock wiring and "to" where on the amp. Based on Robert's earlier comments, I assume I'm tapping two inputs going into the factory amp and connecting those to the RCA jacks. I further assume there is also a trigger wire for the "turn on" lug on the Arc amp. I have the FSM and will start trying to identify the appropriate wires this weekend.


  2. #2
    Senior Member CoCoKola's Avatar
    Join Date
    Jun 2013
    Posts
    290

    Lightbulb

    Quote Originally Posted by F6Pilot View Post
    Here is my start on the wiring. I will readily admit to being a novice, tilting more to the mechanical side than the electrical. You know, if you cant fix it with a bigger hammer...you've got an electrical problem.

    I have posilocks on the way to help with the interconnects, but will really need some help understanding the "from" stock wiring and "to" where on the amp. Based on Robert's earlier comments, I assume I'm tapping two inputs going into the factory amp and connecting those to the RCA jacks. I further assume there is also a trigger wire for the "turn on" lug on the Arc amp. I have the FSM and will start trying to identify the appropriate wires this weekend.
    F6Pilot: I am the polar <cough> opposite. Completing this audio upgrade was my trial by fire as a mechanic. Electrons are my friends. The fabrication was truly an adventure in "oh $hit, now what" but thanks to several here, I made it to the finish line.

    The short <cough> answer is the accessory power pull from the accessory power tab to the left of the battery (I will double check that this is OFF during starter press.) I used the accessory power the stock amp used, but twice during my initial setup, when I had the bike in ACC mode for a while during start depress the sub amp didn't mute and it passed a not so nice signal. I believe this can be fixed by a config change on the 8.9 amp configuration, your post reminded me to verify the cause and resolve it.

    Here is the wiring diagram for the input Molex for the Audison 8.9 and includes the F6B wiring colors and purpose. This chart should work with the ARC or other amps to know what to map to your amp's input side.

    Audison Molex
    Purpose
    F6B Wire
    16 White Front Left + Yellow/Black
    8 White/Blk Front Left – Green/Black
    15 Gray Front Right + Red/Black
    7 Gray/Blk Front Right – Black/White*
    14 Green Rear Left + Pink
    6 Green/Blk Rear left – Light Green
    13 Violet Rear Right + Blue/Black
    5 violet/Blk Rear Right – White/Back*


    For those who have a shop manual, and for your reference, codes used are the following for the F6B:
    Bl – Black
    BR – Brown
    Bu – Blue
    G – Green
    Gr- Gray
    Lb – Light Blue
    Lg – Light Green
    O – Orange
    P – Pink
    Pu – Purple
    R – Red
    W – White
    Y – Yellow

    Attachment 24991 Attachment 24992


    That should get you going. Hope this info helps, it was a $itch to put together

  3. #3
    Senior Member F6Pilot's Avatar
    Join Date
    May 2014
    Location
    Chattanooga, TN
    Posts
    418
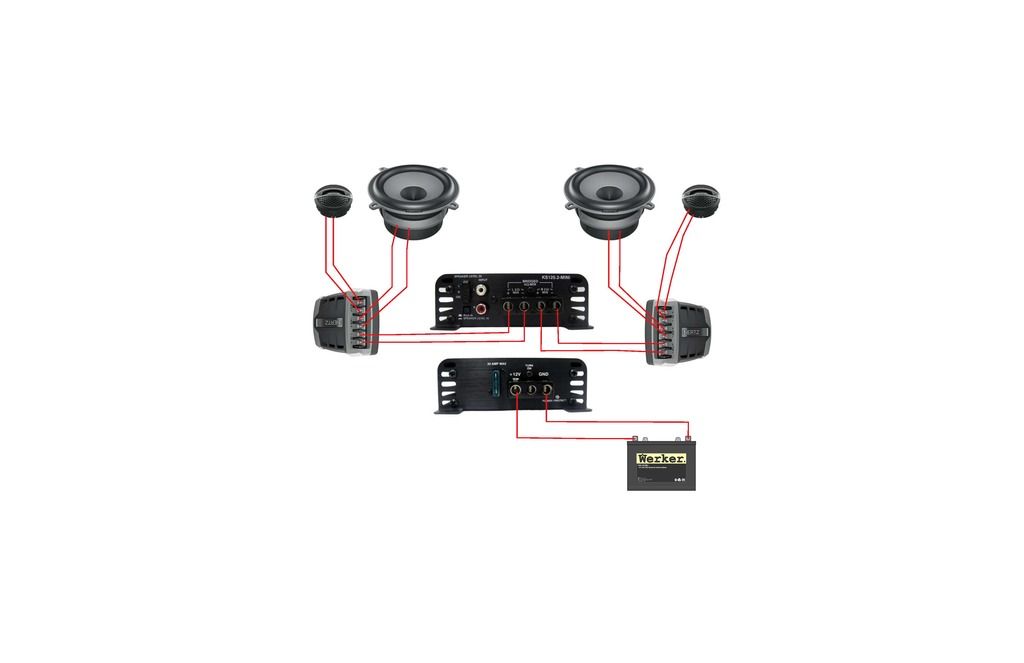
    Robert, thank you for the detailed information. It will speed up my discovery process immensely. There is one piece I am thoroughly confused on and that is the conversion from the pre-amp wires to RCA connectors. I am only running front components so per the manual there are essentially only four wires coming from the head unit into the amp. They feed both the tweeters and the mids and I should tap in to these lines prior to the factory amp. I'm assuming an RCA is essentially a ring and tip configuration for + and - so do you use a high/low convertor to convert from basic wires to the RCA? Additionally, what determines whether the tip or ring is + or -?

  4. #4
    Senior Member CoCoKola's Avatar
    Join Date
    Jun 2013
    Posts
    290
    I'm glad to hear it will help you!

    You will need to splice the first four lines in the chart above. The tip of the rca is the positive and the shield is the negative. Depending on the amp you buy, you will need to purchase twisted RCA cable (such as the mvp4 or and audison amp) or coaxial rca cable. It matters so you don't end up with engine noise or ground loop issues. The cost is about the same. Check your manual to see which kind is needed, or check with your supplier.


    As far as a converter, as long as you tap between the head head unit and the amp, you are getting a low level rca level. It's actually below the standard voltage level for rca, but most amps have enough sensitivity adjustment to make up for the difference. You may need to get a line driver to add additional gain, or if you run into a problem like Jimmy where there is distortion due to the differences.

    I can recommend a couple products that can help. The best option is a dsp unit that costs bucks, but would give you most of what you are missing not having the Audison total eq compensation and time alignment. For another day..

    Cheers!

  5. #5
    Senior Member F6Pilot's Avatar
    Join Date
    May 2014
    Location
    Chattanooga, TN
    Posts
    418
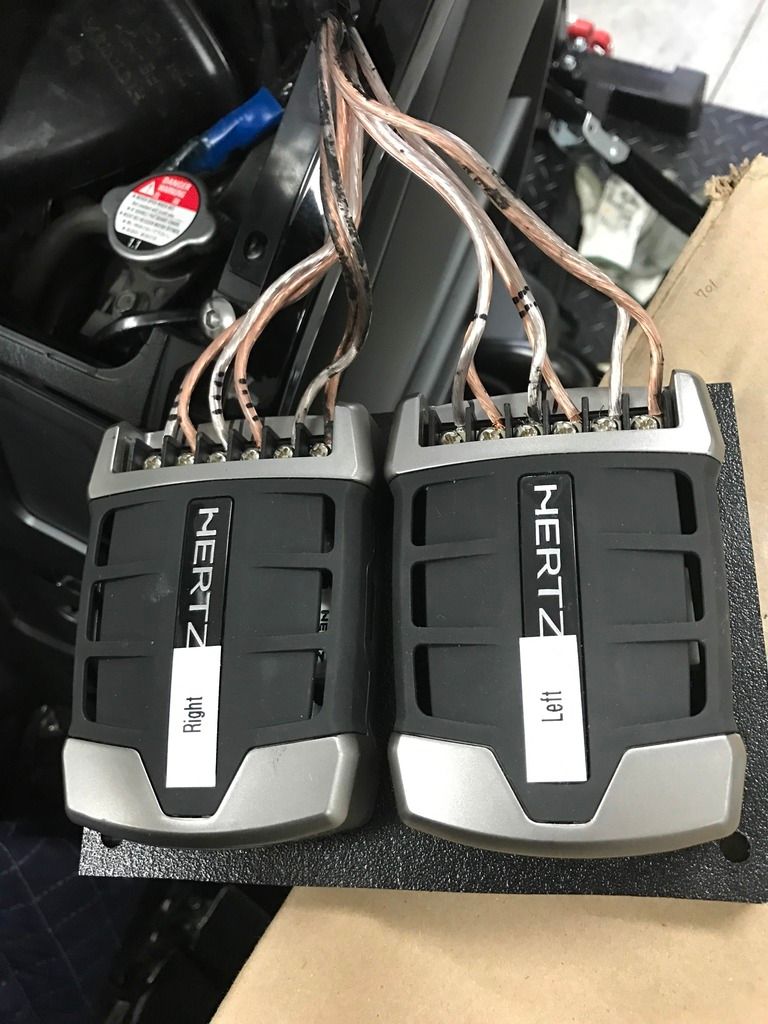
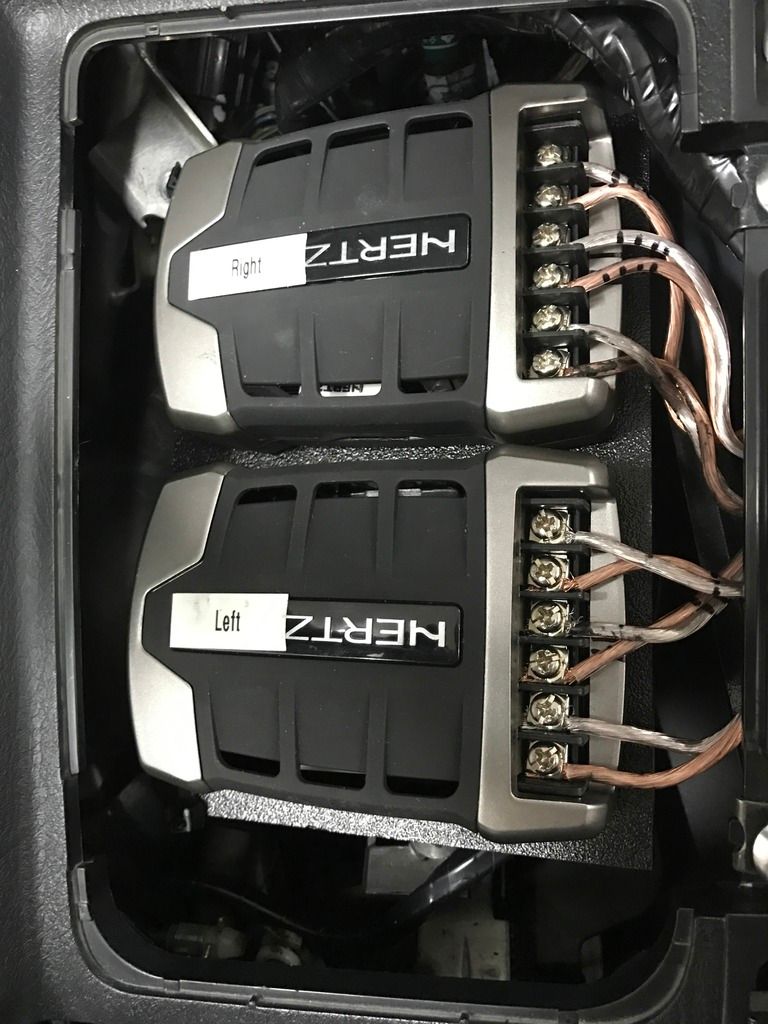
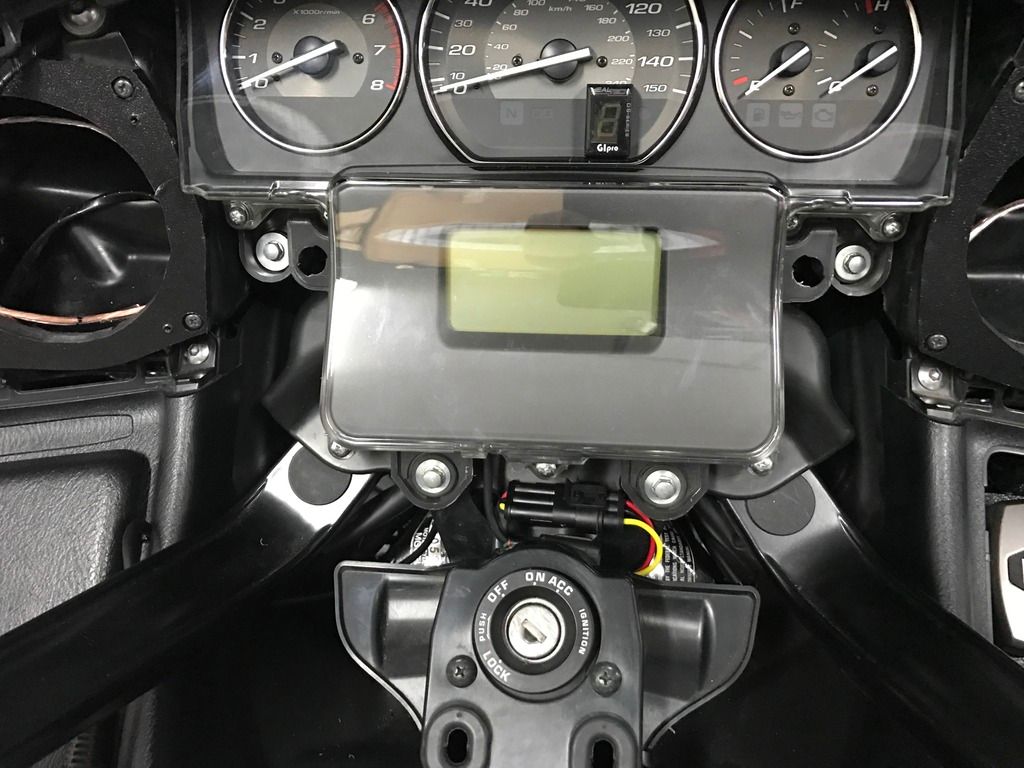
    I finished a little more electrical work today. I got the crossovers wired up and secured with zip ties in the right cubby. In the future I would like to create a more permanent mount/platform for this part of the project. I also soldered in a weatherproof connector for the gear indicator and remounted the gauge cluster. Im really considering taking another tweeter apart so it can be mounted in the stock position. Now that I know what to look for, I believe I can get the grill removed without further incident. If I do experience another malfunction I can always put the first tweeter back together and surface mount the pair.


  6. #6
    Senior Member willtill's Avatar
    Join Date
    Aug 2015
    Location
    Maryland
    Posts
    4,622
    Quote Originally Posted by F6Pilot View Post
    I finished a little more electrical work today. I got the crossovers wired up and secured with zip ties in the right cubby. In the future I would like to create a more permanent mount/platform for this part of the project. I also soldered in a weatherproof connector for the gear indicator and remounted the gauge cluster.
    Oh! Oh! Oh! You mean that you ere able to fit the GI Pro Indicator behind the plastic on the gauge cluster? It actually has enough room to be mounted there?

    I do have cruise control though.. the indicator lights for it would be obscured in that position you had put yours. Wondering if there would be enough to move it to the left; between the bezels of the Speedometer and Tachometer gauges?


    21 years Army (retired)
    ...been everywhere, seen everything, done almost everything.

    IBA 80537

  7. #7
    Senior Member F6Pilot's Avatar
    Join Date
    May 2014
    Location
    Chattanooga, TN
    Posts
    418
    Yes, there is room in the cluster all of the way across. I simply placed mine to the left of the high beam indicator. The clear cover comes off with screws and you simply dremel some notches to route the wire out of the cluster. Be aware that the outer sheathing on the indicator cable is very soft and susceptible to being cut by any sharp edge.

Posting Permissions

  • You may not post new threads
  • You may not post replies
  • You may not post attachments
  • You may not edit your posts
  •