Powering a GPS
Page 1 of 2 12 LastLast
Results 1 to 10 of 18

Thread: Powering a GPS

  1. #1
    Member
    Join Date
    Dec 2014
    Location
    Odessa, TX
    Posts
    60

    Powering a GPS

    Hi guys;

    Thinking about getting a GPS (higher end Garmin, TomTom, etc.) and pretty much think mounting it on the clutch lever side using a Ram mount - the kind that replaces the pinch clamp that actually holds the lever/mater cylinder onto the bars. Question is... how the heck do you get power to the thing? Is there an easy way? Am I going to have to pull the top shelter off to run a power cable up the bar? If so, anybody got a post up on doing it (at least pulling the shelter off, if I gotta run a cable I'll figure it out...)?

    Thanks!

  2. #2
    Senior Member Big Cat's Avatar
    Join Date
    Sep 2015
    Location
    Franklin, TN
    Posts
    144
    Michael,

    I have had a similar mount arrangement for my Garmin 665 on three previous Goldwings. Similar but not the same...I preferred the reservoir cap mount...gets the GPS up a little higher for better visibility, and allows me to use the clamp mount for my Butler mug.

    But either way, the wire routing will be the same, and yes, you will have to remove one side of your top shelter. But relax, it's easy!

    You may want to consider one of several available fuse blocks, to be located under the seat. This greatly simplifies this and future accessory wiring and keeps the battery connection clean.

    Back to the fundamental question, you will need to remove the seat and either the right or left top shelter, then feed the wire up the handlebar. I never really liked that arrangement, as you will need to be very careful to avoid pinching or rubbing the wire when turning the handlebars.

    Think about which side you want the GPS on! I found the left side better, so I could keep my right hand on the throttle while using my left hand to work the GPS.

    If you would consider another option, I have installed my GPS on a farkle shelf above the dash and am 100% happy with the results. Better visibility, right in my line of sight, no more hassle with rubbing or pinched wiring, just a better all-around solution, IMHO.

    If you don't have a set of Goldwing maintenance videos, there are two options I know of, either Fred Harmon or Cruiseman, either one well worth the money. Either one will show you step-by-step how to remove the seat and shelters. It seems to be a daunting task if you've never done it before, but after having done it countless times, it's no big deal!

    If you need help, send me a PM or call me at 615-604-2100 and I'll walk you through it.
    2015 F6B deluxe matte silver
    2012 GL1800 level 3 pearl white
    2010 GL1800 level 1 hot rod yellow
    2001 GL1800 level 1 hot rod yellow
    VTX 1800
    VTX 1300


    Tennessee Traveler #2

    IBA member #48367
    SS 1,000 9/5/11
    BBG 1,500 3/16/13
    SS 2,000 3/16/13
    CC50 3/16/13
    Darkside #975
    Michelin Primacy Alpin RF 195/55R/16, 32#
    front Bridgestone G709, 36#

  3. #3
    Junior Member Canuck_Doug's Avatar
    Join Date
    Feb 2015
    Location
    Burlington Ontario
    Posts
    19

    Tom Tom Rider GPS hardwire install

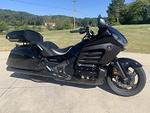
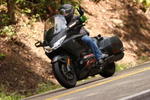
    Hi Mike. I recently purchased a Tom Tom Rider. It came with RAM mounting hardware and a power cable. As you can see from the attached pic's, I attached the GPS to the clutch reservoir and ran the power cable through the conduit on the handle bar down out towards the front of the bike and then back into the left cubby through the cable grommet. There is an available connector that offers the same 12v aux socket connector that I used to connect the power cable to the GPS to.
    It works perfect. You turn the bike on and it powers the GPS.Attachment 19384Attachment 19385Attachment 19386

  4. #4
    Junior Member dksmith's Avatar
    Join Date
    Oct 2013
    Location
    Mocksville, NC
    Posts
    28

    zumo 660 installed

    I installed my Garmin on clutch perch using supplied mount. I removed cubby and connected audio output to aux input. Audio now comes through bike speakers and music on garmin automatically mutes when it speaks directions. For power I removed only the side cover that gives access to battery and fuse box. Pushed a large TyRap under shelter a few times until it came out where power wire is. Taped power wires to it and pulled back through. No shelter removal. I did have to extend the power wires to reach the aux terminals so there was enough loop left up front for lock to lock steering input.

  5. #5
    Senior Member F6Pilot's Avatar
    Join Date
    May 2014
    Location
    Chattanooga, TN
    Posts
    414
    I followed the same route as Canuck_Doug with both the mount and wiring for my Garmin. I also cut the supplied power lead near the mount and installed a weatherproof plug in line. That way I can remove both the gps and the mount if I desire.

  6. #6
    DarkSider#1617 Steve 0080's Avatar
    Join Date
    Dec 2012
    Location
    Sanford,FLA
    Posts
    8,079
    http://www.touratech-usa.com/Store/1...Locking-Silver

    http://www.kradellock.com/


    I have the top one, the bottom one is very nice and cleaner line...
    Attached Images Attached Images
    " Truth is often deemed rude, blunt and to the point which is why so few make their friend " Freddy Hayler ..352-267-1553 Sanford, FLA Gutterman6000@Gmail.com

  7. #7
    Senior Member Fla_rider's Avatar
    Join Date
    Mar 2014
    Location
    Riverview, Florida.
    Posts
    1,729
    The shelter is fairly easy to remove. My Garmin is high up on my screen, I ran the garmin cable from the left cubby up through the fairing and drilled a hole in the dash to run it through. It comes out at the inside bottom of the screen. Presto!

    IMG_0618.JPG IMG_0616.jpg

    You can see the power cord in the second pic.
    John (Jay) Bettua
    2014 F6b Red- sold 2016
    2020 Goldwing Matte Black
    Retired U.S. Air Force MSgt


  8. #8
    Senior Member lloydmoore1's Avatar
    Join Date
    Feb 2014
    Location
    Fredericton,NB,Canada
    Posts
    585
    Check out this link and it might help.
    http://hondaf6b.com/showthread.php?7...s-install-Help!!

  9. #9
    Senior Member ReserveBum's Avatar
    Join Date
    Nov 2013
    Location
    Riceville TN
    Posts
    621
    Temporary set up - I only use the GPS occasionally so I use the Ram set up with a short extension and just run the power cord into the left cubby where I installed a socket. Cut a little notch out of the cover to allow the wire to pass through.

  10. #10
    Senior Member Fla_rider's Avatar
    Join Date
    Mar 2014
    Location
    Riverview, Florida.
    Posts
    1,729
    Yeah Reserve I had the cable running thru the top with a notch. It got to be a bit of a pain. Closing takes a bunch of cussing and opening wasn't much easier.
    John (Jay) Bettua
    2014 F6b Red- sold 2016
    2020 Goldwing Matte Black
    Retired U.S. Air Force MSgt


Posting Permissions

  • You may not post new threads
  • You may not post replies
  • You may not post attachments
  • You may not edit your posts
  •